Before detailing, clear a flat workspace, gather microfiber cloths, cleaning solutions, and tools like brushes, polishers, and clay bars. Start with a thorough car wash, then use a clay bar to remove impurities. Polish with carnauba wax for protection and shine. Protect plastic trim from UV rays with specialized guards or wraps. Use tailored Select DIY Auto Repairs tools and products for best results.
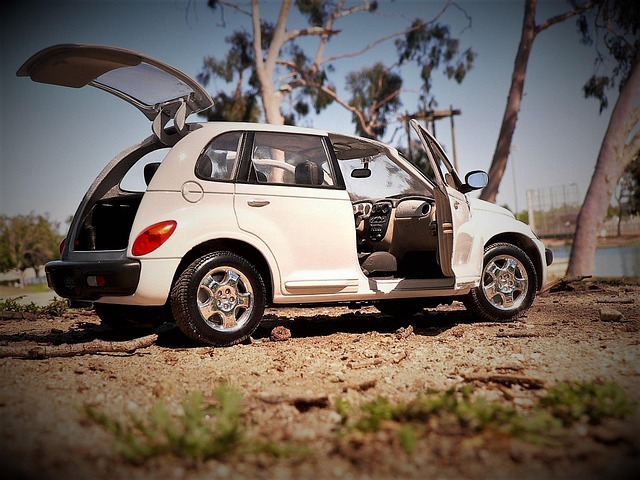
Looking to give your car a sparkling exterior? This comprehensive guide walks you through simple yet effective DIY auto repairs for achieving a showroom finish. From preparing your workspace and gathering supplies, to washing, detailing, and protecting every inch of your vehicle’s exterior, we’ve broken down the steps for ultimate auto exterior detailing. Discover how to select the right products and techniques using readily available tools, making it easy to maintain that fresh, protected shine with confidence.
- Prepare Your Workspace and Gather Supplies
- Wash and Rinse the Exterior Thoroughly
- Apply Clay Bar for Removing Surface Impurities
- Polish and Seal the Paint with Carnauba Wax
- Protect Trim and Accessories with Specialized Products
Prepare Your Workspace and Gather Supplies

Before you begin the process of auto exterior detailing, it’s crucial to prepare your workspace and gather all necessary supplies. Start by clearing a wide, flat area where you can comfortably work on your vehicle without obstruction. Ensure proper ventilation, as some detailing products may emit strong fumes. This is especially important if you’re opting for DIY auto repairs, where selecting the right tools and materials can significantly impact the outcome.
Gather all the essential supplies like microfiber cloths, cleaning solutions, polishers, wax, and brushes tailored to different car parts. Remember, proper preparation ensures a seamless detailing experience. Similarly, consider tasks like regular tire rotation instructions and addressing car battery charging problems to maintain your vehicle’s overall health alongside the exterior detailing process. Don’t forget to have diy wheel alignment tips at hand if you plan to align your wheels for a more polished look.
Wash and Rinse the Exterior Thoroughly
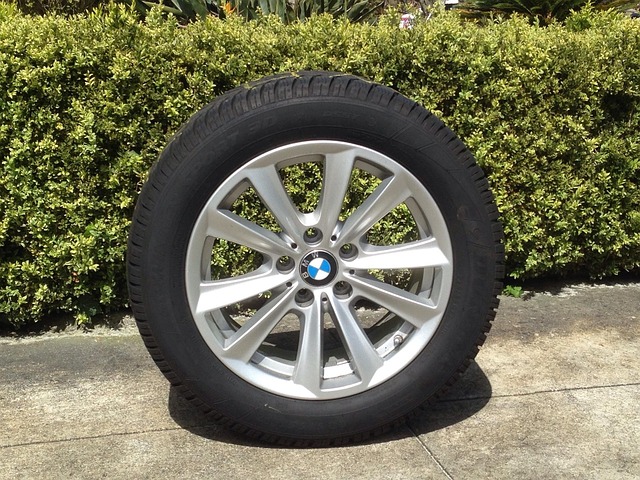
Before diving into any auto exterior detailing steps, it’s crucial to start with a clean canvas. Begin by selecting a suitable car wash location, preferably one designed for thorough cleaning. Use a dedicated car shampoo and soft-bristled brush to gently wash your vehicle, ensuring you reach all corners and crevices. Pay special attention to the tires, wheels, and wheel arches, as these areas often accumulate dirt and grime. After washing, rinse the exterior thoroughly with clean water, removing any remaining soap residue.
A key aspect of auto exterior detailing involves proper preparation. This initial wash and rinse step is fundamental, especially when considering DIY auto repairs like tire rotation instructions or even tackling something as basic as car electrical repairs diy. By ensuring a clean surface, you enhance the effectiveness of subsequent detailing processes, such as sealing and waxing, which not only protect but also enhance your vehicle’s exterior appearance.
Apply Clay Bar for Removing Surface Impurities
After washing your car to remove surface dirt and debris, it’s time to take care of those stubborn impurities that can’t be washed away. One effective tool in an auto detailer’s arsenal is the clay bar. This simple yet powerful tool helps you achieve a deeper clean by removing bonded contaminants, tar, and resin from your car’s paintwork. Start by thoroughly drying your vehicle, then select a suitable clay bar for your needs; there are different types designed for various surfaces. Work the clay bar in small sections, applying it with minimal pressure and following its instructions to ensure maximum effectiveness.
For those who prefer DIY auto repairs, using a clay bar is a great way to enhance your car’s exterior appearance and prepare it for other detailing steps like waxing or sealing. While it might seem intimidating at first, this process can be surprisingly straightforward. Remember, taking care of surface impurities not only improves the aesthetics of your vehicle but also ensures that any subsequent coatings adhere better, enhancing the longevity of your auto finishes.
Polish and Seal the Paint with Carnauba Wax
After washing and drying your car, it’s time to polish and seal the paint with carnauba wax. This step is crucial for protecting your vehicle’s finish and giving it a glossy, professional shine. Carnauba wax provides a durable barrier against UV rays, bird droppings, tree sap, and other environmental contaminants that can damage the paintwork. It also adds a subtle depth and clarity to the color, enhancing the overall aesthetics of your car.
When applying carnauba wax, ensure you use a soft cloth or applicator pad designed for this purpose. Spread the wax evenly across the surface, working in small sections at a time. Allow it to dry slightly, usually around 5-10 minutes, before buffing off with a clean microfiber towel. This process not only leaves your car with a stunning finish but also helps in maintaining simple auto repairs for beginners, as regular waxing can prevent more complex issues down the line, such as repairing a loose steering wheel or exhaust pipe.
Protect Trim and Accessories with Specialized Products
When detailing your vehicle’s exterior, don’t overlook its trim and accessories. These elements, often made from plastic or vinyl, can be susceptible to sun damage, fading, and cracking over time. To protect them during the detailing process, use specialized products designed for these materials. Look for UV-resistant guards or wraps that will shield them from harmful rays, ensuring they maintain their original appearance.
Selecting DIY auto repairs tools and products tailored for trim and accessories is key. These specialized items are often less harsh than general-purpose cleaners and waxes, preventing any damage while enhancing the overall look of your vehicle’s exterior. Remember, even simple auto repairs for beginners can make a significant difference in protecting these intricate details, ensuring they remain vibrant and intact for years to come.
When it comes to enhancing your vehicle’s exterior, choosing DIY auto repairs like these detailing steps can be a rewarding way to restore its beauty. From preparing your workspace to sealing with carnauba wax, each step contributes to a glossy, protected finish. Don’t forget to protect trim and accessories with specialized products for a complete transformation. Select DIY auto repairs that suit your skills and enjoy the satisfaction of a meticulously detailed car.